
The best camera settings for travel photography
general advice
Use your phone
Travel light, practise your composition, and just use your phone for a day. I shot all these images of a day trip to Paris on my iPhone 5S:

Don't be afraid to shoot on auto modes
You've travelled a long way - don't miss the shot. If you're not completely comfortable shooting off auto, then don't. Practise when you've got the time, but otherwise use Auto or Program mode, or one of the preset modes. Portrait mode will blur the background behind your subject; Landscape mode should help you get everything in focus; and Sports mode will try to freeze the action of fast moving subjects.
Camera settings for travel photography
General settings
Focus: Leave your camera on auto focus, but learn how to quickly switch to manual focus in case your auto focus is picking the wrong subject.
Metering mode: Pick whatever is the default or general metering mode for your camera - the one that takes a reading from most of the frame but prioritises the middle. Read more about metering modes in your manual.
White balance: this is the way the camera records white tones. If you are under blue lights, it should record white as slightly blue. At sunset, whites should be slightly orange. Your camera will have an "auto white balance" setting, which is usually good enough. It may have manual white balance settings as well, which are useful in extreme lighting conditions.
Auto ISO: if your camera has auto ISO (check the manual), it is the most useful setting to use. It means that your camera will pick the lowest ISO possible, but will allow the ISO to creep up as it gets darker, saving you those blurred early evening photos. We cover ISO early on in the AYWMC lessons that start in January.
Lens choice: unless you are on a dedicated photography trip, I'd suggest keeping your lens choice as small and as light as you can bear. I used to carry my huge 70-210 with me everywhere I went, but I've recently bought a very compact super zoom for travel. It doesn't have a nice wide maximum aperture, but it also doesn't make me want to head back to my hotel before we've even got to lunch.
Travel gently: think about the impact you being there has on the locals. It might be great to bag a "grizzled fisherman" shot - but how would you feel if your positions were reversed?
Aperture priority: if you know what aperture priority mode is, I'd recommend using that over shooting fully manual when you're travelling, unless you can shoot manual without looking. It's what I do, and it allows you to appreciate the place you're in instead of constantly making shutter speed calculations in your head. This is always useful if your family only allow you a millisecond to stop and take a shot from the car:
Specific settings
These are ideal settings, to maximise whatever your creative priority is. All the technical information about aperture and shutter speed is covered in the first 3 weeks of the course that starts in January, but if you want a head start, have a go with some of these suggestions:
Landscape: the priority is usually front-to-back focus. To achieve this you use a small aperture, like f16 or f22. This shot was aperture priority, f16, ISO200, 30 seconds (with a tripod):

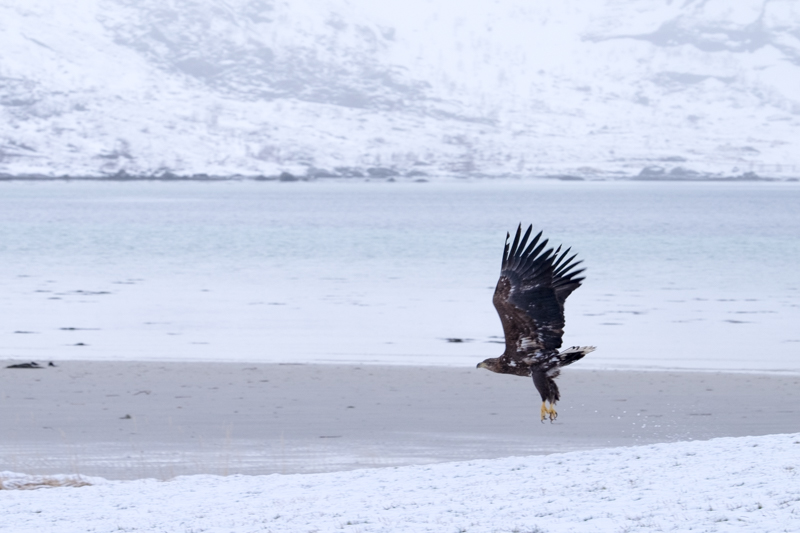
Wildlife: With moving subjects you would prioritise your shutter speed, to freeze the action. These deer were easily startled so I was using a longer lens (200mm), shutter priority mode (1/250th), and I let the camera pick ISO and aperture (400 and f2.8):

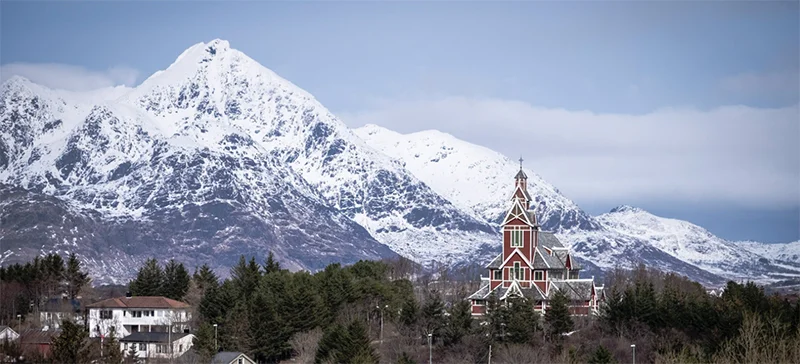
Buildings: Unless you have an architectural tilt-shift lens, the problem with shooting buildings is what's known as "converging verticals". This is where the distortion of a wider-angle lens makes the building seem like it is sloping inwards:

You have a couple of options. You can go ahead and shoot anyway - it's not too bad a photo. You can fix it in editing. Or you can walk much further away from the buildings, and use a longer lens:

Sunrise and sunsets: The main problem with shooting at each end of the day is that the high contrast fools the camera's auto exposure calculations, and more often than not you will have a photo that is much darker than you remember. Find out how to use exposure compensation on your camera, and dial in 1 to 2 stops of PLUS compensation to make the image brighter. Don't forget to put it back again afterwards:

Food: It's going to be dark. Don't be tempted to use your flash - it will just blast your photo with bright white light, killing all the atmosphere. Use a high ISO if you know how, or just use your phone.

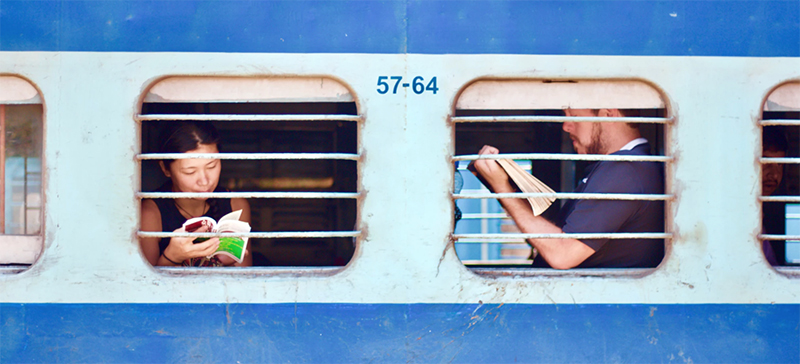
People: Like wildlife, they move. Use a faster shutter speed, and let ISO take up the slack if needed. Be respectful, ask permission where possible.

Online photography class
A Year With My Camera is free by email. Join here and get started today:

You might also enjoy:
7 ways to leave your comfort zone behind for good
What’s the best lens for travel photography?
Read all our travel photography resources