
Macro: focus stacking
Focus stacking is all about extending the limited depth of field encountered when you take macro and close-up photographs, effectively enabling you to overcome the physical limitations of your camera and lens to make otherwise ‘impossible’ images.
Post author: Chris Gatcum
FREE ONLINE BEGINNER’S PHOTOGRAPHY COURSE
A Year With My Camera is free by email and will get you off auto mode in less than 6 weeks. Join here and get started today:

Focus Stacking
When you shoot close-up and macro photographs, your depth of field is going to be severely curtailed – it could be just fractions of a millimetre. If you’re looking for an ultra-shallow depth of field in your images this might not be an issue, but what if want to reveal more of your subject to your viewer? Unfortunately, this isn’t something you can overcome through your choice of camera settings, and nor is it something you can buy your way out of with an exotic lens or accessory. There is one possible solution, though: focus stacking. Let’s take a look at how it's done.
Shooting

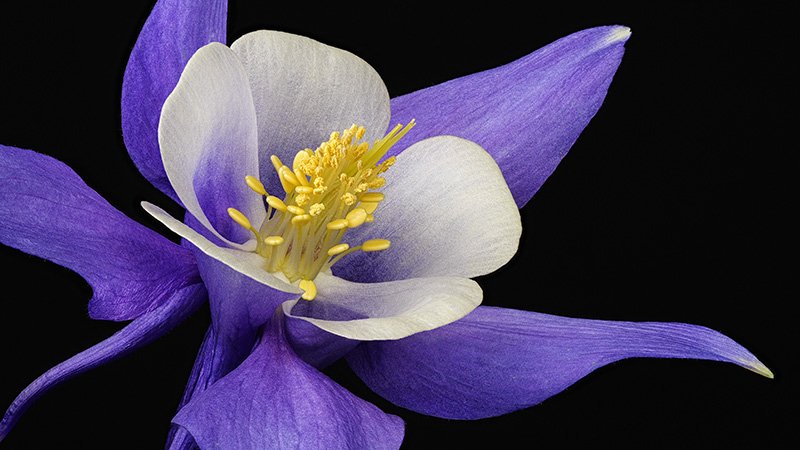
This figure measures roughly 7cm from the tip of its beak to the end of its tail. Photographed with a combination of a macro lens set at f/8 (the lens’s ‘sweet spot’) and a short extension tube, the depth of field is a couple of millimetres at most. Focus stacking can easily change this, though.
Focus stacking is a two-part process that starts with the picture-taking stage. Rather than taking a single photograph, multiple exposures are made, with each one focused at a slightly different distance. The sharply focused parts of each frame are then combined during post-processing to create a single composite image with an extended depth of field that simply wouldn't be possible in a single shot.
The key thing at the shooting stage is consistency. You want to aim for the exposure, white balance, framing – pretty much everything except the point of focus – to be exactly the same for each shot in your sequence. This typically means setting your camera manually, rather than relying on automatic modes.
1. Start by setting your camera up on a tripod and making sure your subject is held still so there’s no chance of either one moving between exposures (for this reason focus stacking is best suited to static subjects). Switch to Manual shooting mode and dial in the aperture, shutter speed and ISO. An aperture in the region of f/8–f/16 will give you a good balance of depth of field and quality, while a low ISO (100–200) will ensure noise-free images; the shutter speed can be determined based on the other two settings. Pick a pre-set white balance (or set a custom colour temperature).
2. With your image framed and your settings dialled in, switch to manual focus and focus on the closest part of your subject that you want to appear sharp in your final image. Take your first shot.

A macro focusing rail is useful for a lot of close-up photography, but the precision it brings to focus stacking makes it almost essential.
3. Tweak the focus slightly, so the focus point is slightly further away from the camera and take a second shot. The crucial thing here is that the depth of field in your shots overlaps, as any part of your subject that isn’t sharp in at least one of the images will appear as a ‘soft spot’ in your final composite – a macro focusing rail is hugely beneficial here, as it will let you make ultra-precise adjustments.
4. Adjust the focus again, so it’s a little further still from the camera, and shoot for a third time. Keep adjusting the focus and shooting until you reach the furthest part of your subject that you want to appear sharp in your final image. Err on the side of caution and shoot more frames with a larger overlap, rather than trying to make fewer exposures with smaller overlaps.
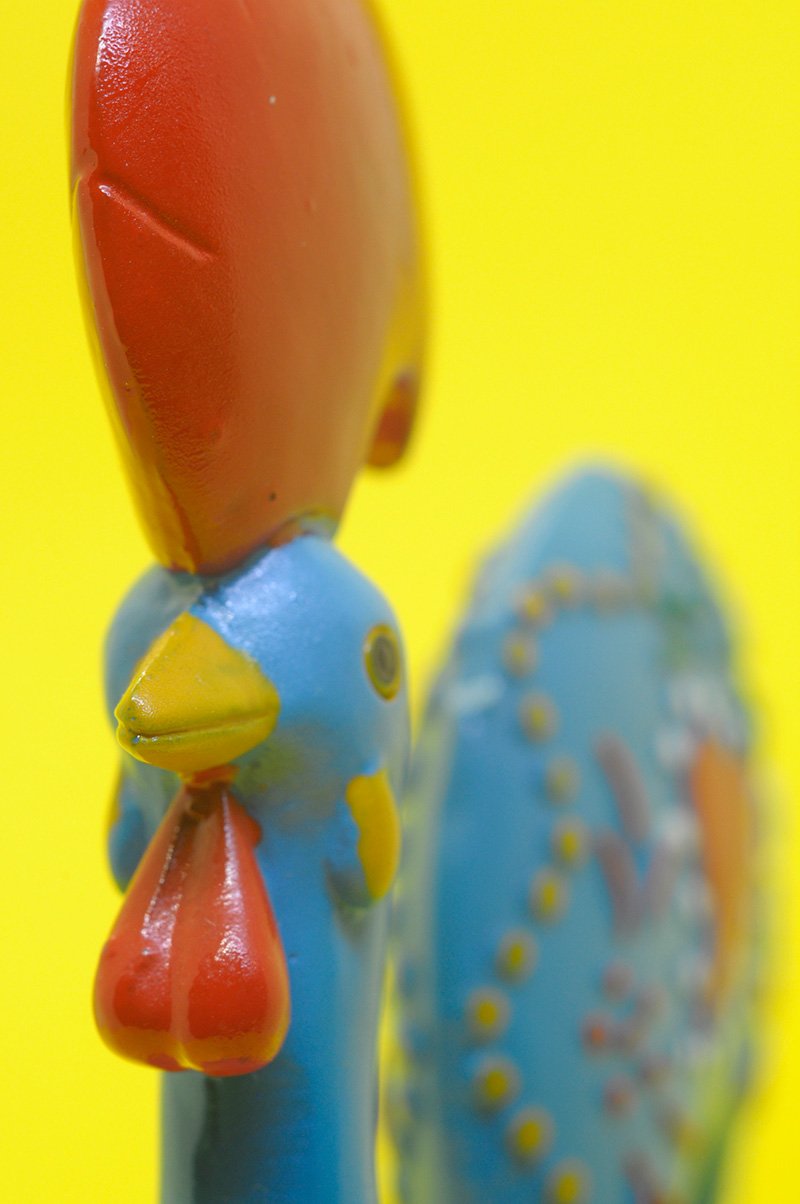
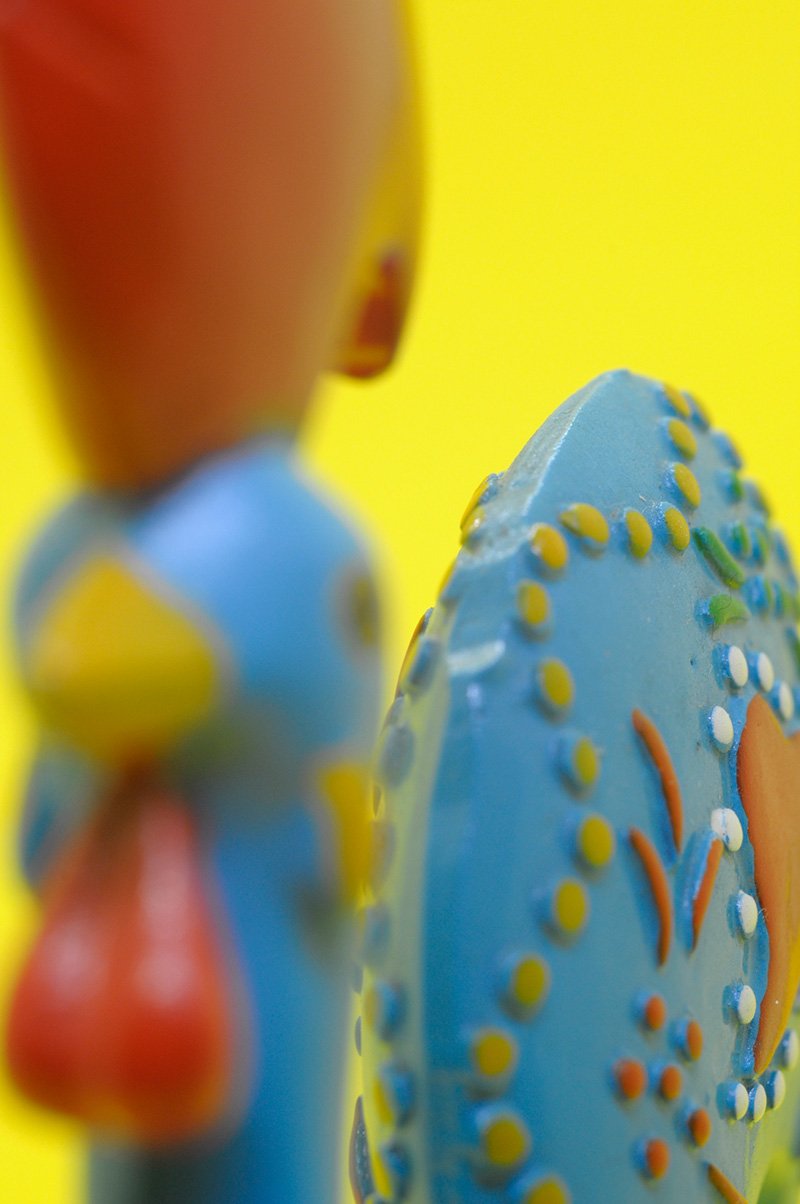
The first and last images in the stacking sequence. To ensure there were sufficient overlaps in the depth of field, the focus was shifted by less than 1mm between shots, using a macro focusing rail for fine control.
5. The number of exposures you need to make will be determined by the magnification you’re shooting at, the aperture you’re using and the depth of field you want to achieve – the greater the magnification, the wider the aperture and the deeper the intended depth of field, the more shots you will need.
Processing
At the end of the shooting stage you should have a series of images that are essentially identical, apart from their point of focus. The next step is to combine the sequence so the ‘sharp’ parts of each image come together and create an apparently deeper depth of field. For this exercise we’re going to use the photographer’s favourite, Adobe Photoshop.
1. If you shot Raw, the first step is to process your images, but if you shot JPEGs you can skip this stage. Assuming you took the Raw route, apply any exposure, colour, contrast and other adjustments as you would normally, but make sure that any adjustments are applied equally to every image in your sequence – the only difference between them should still be the point of focus, everything else should be identical. When you’ve done your basic processing, export the images as TIFF or JPEG files.
2. To import your TIFF or JPEG images into Photoshop, open Photoshop (but not your images) and choose File > Scripts > Load Files into Stack from the main menu. The dialogue allows you to choose individual files or a folder of images to open. In either case, click Browse to locate your sequence on your computer and check the Attempt to Automatically Align Source Images box. When you’ve selected your images (or the folder they’re in) click OK and Photoshop will open all of your images as individual layers in a single file, correcting any minor discrepancies between them as it does so. Depending on the number of images in your sequence, and their resolution, this may take a while…

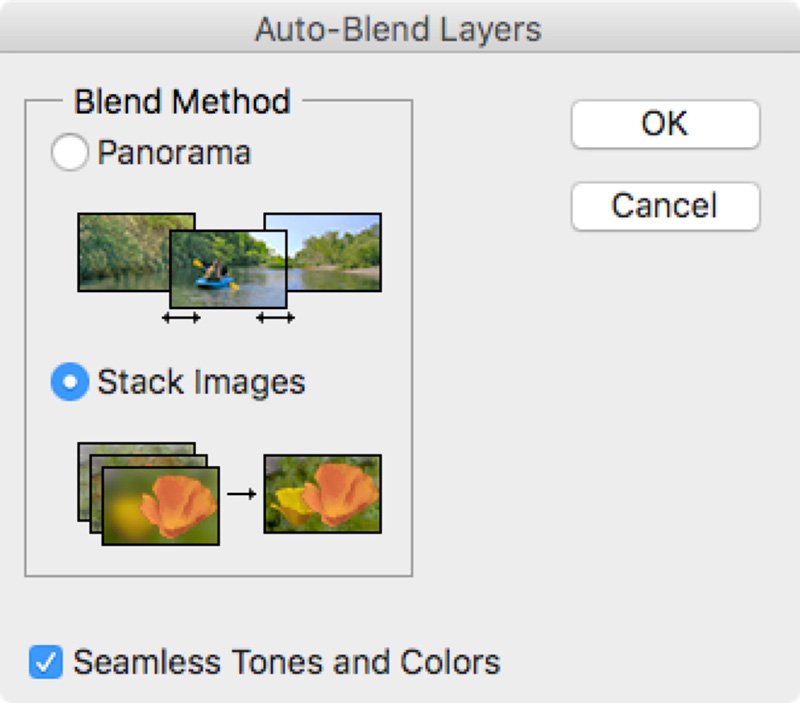
3. Once your image layers have been loaded, open the Layers palette and select all of the layers by holding down the Shift key and clicking on the first and last layers in the layer stack. Choose Edit > Auto-Blend Layers from the main menu, and set Stack Images as your Blend Method. Check the Seamless Tones and Colors box in the dialogue box and hit OK.
4. You’ll now have another (longer) wait while Photoshop analyses each layer, taking the sharpest elements from it and creating a layer mask so that only the sharp area is visible. The result? A composite image with an extended depth of field.

5. If there are any areas that look slightly strange once the masking process has finished you can go in and manually edit the layer masks. You might also want to need your image slightly, as the aligning and blending stages can sometimes create an irregular ‘jagged’ edge. When you’re done, flatten the layers down and fine tune the image like any other, applying Levels and Curves adjustments, or maybe converting your composite to black and white.

The final stacked image was assembled in Adobe Photoshop, as outlined above, and processed using Exposure X6. It now has full front-to-back sharpness, which would have been impossible to achieve with a single exposure.
Alternative Apps
Although we used Photoshop here, it is not the only focus stacking software solution. ON1 Photo Raw and Affinity Photo are alternative photo editors with stacking capabilities, while Helicon Focus is designed specifically for the task, with the option to work with Raw files (the same company also makes an automated extension tube that can be programmed to make fixed focus shifts for you).
At the opposite end of the cost spectrum are CombineZP and Picolay – a pair of free Windows-only apps – and the website, focusstackingonline.com, which offers zero-cost focus stacking to anyone with an Internet browser.

WHAT IS A YEAR WITH MY CAMERA?
Emma Davies wrote A Year With My Camera to help you be completely confident with your camera controls so you can start enjoying your photography and having fun once again. It’s available free by email (join below) or in an app (search on your app store) or in bestselling printed workbooks available on your local Amazon store.
You might also enjoy: