
Introduction to macro photography
In photography, the terms ‘close-up’ and ‘macro’ are often used interchangeably to describe any photograph that magnifies its subject, or part of it, to give us a ‘larger than life’ view, but strictly speaking, close-up and macro are two different things. Close-up is an ill-defined, catchall term that can be applied to any photograph that you might describe as being seen ‘closer than normal’, whereas macro refers quite specifically to any instance where the subject is photographed at life-size or larger.
Post author: Chris Gatcum

Macro photography opens up a new world of creative opportunities, where even the simplest subject, such as bubbles in water can be transformed into a work of art
FREE ONLINE BEGINNER’S PHOTOGRAPHY COURSE
A Year With My Camera is free by email and will get you off auto mode in less than 6 weeks. Join here and get started today:

Magnification ratios
‘Life size’ is often expressed as a magnification ratio of 1:1, or you may see it described as 1x magnification, but in either case it simply means that whatever you are photographing is being projected on to the sensor at its actual size; so something measuring 5mm across in the real world will cover 5mm of the camera’s sensor, while an object measuring 36x24mm, such as a large postage stamp, would neatly fill a full-frame camera’s sensor (which also measures 36x24mm). It is important to note that this has nothing to do with the size you view the image at – you can print it much larger than life – it only refers to the size of the subject as it appears on the camera’s sensor.
Of course, macro photographs can be larger than life size, at which point you might see a magnification ratio of 2:1 or 2x (twice life size), or more – Canon’s MP-E 65mm macro lens can deliver a magnification of 5:1 or 5x, for example, which means your subject can be photographed up to five times larger than life.
Getting close
While close-up photography might be possible with your current camera and lens(es), you may well need some more specialist equipment if you want to focus closely enough to explore macro photography. The good news is there are plenty of options to choose from, at a range of price-points. Which of these is the most appropriate for you will depend largely on your preferred subject, how and where you take your photographs and whether you are willing to make potential compromises to the quality of your images. Let’s take a look at what’s on offer:
Macro lens


Your subject will generally guide your choice of macro lens focal length: insects typically require a longer focal length (and greater working distance) than static subjects.
The easiest way to take macro photographs is with a dedicated macro lens. Most camera manufacturers and third-party lens makers have at least one macro lens in their line-up, and these typically make macro photography as straightforward as shooting ‘regular’ photographs. Indeed, most macro lenses will also double as a ‘normal’ lens, so they are not just for close-up shooting (although Canon’s MP-E 65mm noted above is one of few exceptions to this rule).
The majority of these lenses have a fixed focal length in the range of 60mm to 180mm, with longer lenses offering a greater working distance (the distance between the camera and subject) and costing more. For a lot of still-life macro work, the working distance is not necessarily an issue, and a macro lens in the region of 60–105mm is usually a more cost-effective option, but if you are photographing insects or other subjects that you can’t, or don’t want to, get close to you may well benefit from a longer focal length.
As well as prime macro lenses, plenty of zoom lenses offer a ‘macro’ setting. Be wary though, because while this will typically allow you to focus closer, you may find the maximum magnification ratio is 1:2 (0.5x or half life size) or maybe even 1:4 (0.25x or quarter life size). Not only does this not quite satisfy the 1:1 reproduction of a true macro lens, but it may also apply only at one focal length in the zoom range, which might not be ideal for your subjects.

Extension tubes
Extension tubes fit between the camera and lens, moving the lens physically further from the sensor. This reduces its minimum focus distance and allows you to shoot close-up or macro photographs. The simplest (and cheapest) extension tubes don’t support any type of automation, so you’ll need to focus and set your exposures manually, while the most sophisticated tubes retain all of your camera’s automatic functionality, making macro photography a point-and-shoot exercise (albeit at a significantly higher price).
In each case, the depth of an extension tube determines how much closer it will let you focus, and combining multiple tubes will let you get even closer. However, the longer the tube(s), the less light passes through to the camera’s sensor, which means you need to set a higher ISO, wider aperture or slower shutter speed to compensate. For optimum image quality, extension tubes are best used with prime lenses, rather than zooms.
Macro bellows

Macro bellows act in the exact same way as extension tubes, in that they move the lens away from the camera. However, with bellows you can precisely control the magnification across a wide range, so it’s like having multiple tubes in a single item. Bellows are considerably more expensive than extension tubes, though, especially if you want to retain your camera’s automatic exposure and focusing – there are very few electronic bellows available. They are also bulkier and take longer to set up than extension tubes, making them best suited to indoor photography and static subjects. Like extension tubes, bellows work best with a prime lens.
Close-up lenses

Close-up lenses screw to the front of your lens like a filter and act in a similar way to a magnifying glass. The level of magnification is measured in diopters – typically running from 1–4 – with higher numbers equating to greater magnification. As with most macro tools, using them on a prime lens will give you the highest quality results, and multiple lenses can be combined to focus even more closely. Unlike extension tubes and bellows, there is no loss of light when you use close-up lenses and your camera’s automatic focusing and metering will also work as normal, which makes them very easy to use.
Unfortunately, even the best close-up lenses tend to produce slightly soft images, with coloured fringing appearing towards the corners of the frame, and this gets significantly worse if you stack multiple lenses. They are, however, a cheap and cheerful close-up option.
Reverse lens

If you already own a prime lens, you can transform it into an effective close-up lens by simply mounting it back-to-front on your camera. All you need is a ‘reversing ring’, which is an adapter that screws into the lens’s filter thread and gives you a bayonet lens mount on the other side. The ‘front’ of the lens can then be attached to the camera body, with the back of the lens now facing the world. This is an exceptionally cheap solution that doesn’t involve any light loss and has minimal impact on image quality. However, as there are no electronic connections you will need to set your exposures manually and use a lens that lets you stop the aperture down manually as well. A manual focus 50mm prime lens makes a great option here, and because you’re mounting the lens via its filter thread, you don’t have to buy a lens with the same mount as your camera – the combo shown here sees an Olympus Zuiko 50mm lens (from an Olympus OM film camera) mounted on a digital Nikon camera.

Your choice of lens or lens attachment will determine whether you can shoot ‘true’ macro images, or close-ups. This close-up detail of a kiwi fruit would be possible with most close-up tools, but to get closer you would need a macro solution.
Macro Gear “Pros”
Macro lens: As easy as using a ‘normal’ lens. Can also be used for regular photographs. Good for any subject.
Extension tubes: Negligible loss of image quality. Basic tubes are exceptionally cheap. Sophisticated tubes retain full camera automation. Good for most subjects.
Macro bellows: Can adjust the magnification factor. Negligible loss of image quality. Good for considered studio work.
Close-up lens: Low cost. Retain full camera automation. Good for trying close-up photography on a budget.
Reverse lens: Low cost. Minimal loss of image quality. No light loss. Good for photographers with a manual prime lens to hand.
Macro Gear “Cons”
Macro lens: Cost.
Extension tubes: Light loss; worsens when longer/multiple tubes are used. Infinity focus is not possible.
Macro bellows: Light loss; worsens at longer bellows extensions. Expensive. Slow to set up.
Close-up lens: Fixed magnification factor. Lose infinity focus with lens attached. Generally low image quality; worse when multiple lenses are used together.
Reverse lens: No autofocus. No auto exposure. Need to stop aperture down manually.
Other accessories
As you will see in the next instalment of this series, there is a whole host of technical challenges to overcome in macro and close-up photography, but having the right gear will help you no end.
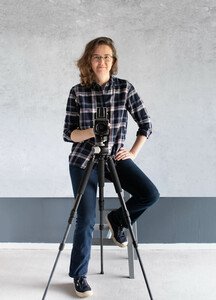
Tripod
Although a tripod can be useful for most types of photography, for macro work it should be considered essential. Moving your camera just a millimetre or two can be enough to turn a sharp photograph into a blurred one, but a tripod will make sure your camera isn’t going anywhere.

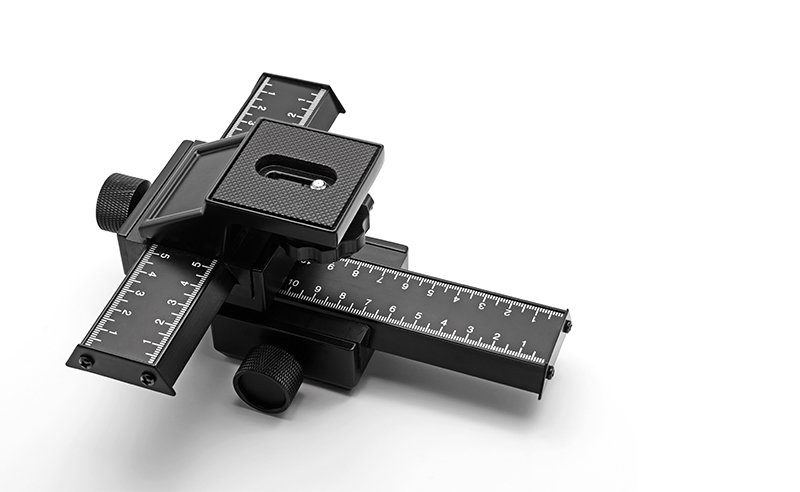
Macro focusing rail
When you’re photographing close-up, the tiniest movement can have a huge impact on what’s in the frame. A macro focusing rail sits between your camera and tripod and provides you with a geared way of making tiny adjustments to the camera position. A basic rail will let you move the camera from side to side to optimise your framing, and forward and back to fine-tune the focus, which is far more accurate than adjusting your tripod or focus manually. A focus rail is also useful if you want to use focus stacking, which we will look at in a later post.
Reflector arms/clips
Whether it’s holding your subject steady, positioning a reflector precisely, or adding a diffuser to soften the light or shade your subject from the wind, there will be countless situations where you simply don’t have enough hands to hold everything. For this reason, clips, clamps and flexible arms are essential aids – perhaps the best known of these helping hands is Wimberley’s ‘Plamp’.
WHAT IS A YEAR WITH MY CAMERA?
Emma wrote A Year With My Camera to help you be completely confident with your camera controls so you can start enjoying your photography and having fun once again. It’s available free by email (join below) or in an app (search on your app store) or in bestselling printed workbooks available on your local Amazon store.