
Introduction to flash photography
Flash photography for beginners
Flash is one of the most useful tools you can use to throw a little extra light on your subject. A splash of flash on a sunny day is all you need to fill-in harsh shadows in a portrait, or it can become your sole light source when the light levels dip or you find yourself shooting indoors. At the same time, flash is an incredibly creative tool that will enable you to use innovative lighting set-ups on location or make imaginative images in the studio.
Using flash can be slightly daunting, though, because the brief burst of light that it produces is so elusive – it happens so quickly that we can’t really see what effect it’s had until after our exposure is made. Yet despite the challenges that flash poses, the instant feedback and histogram on your digital camera, and the option to take as many shots as you like to ‘get it right’, have made it a whole lot easier So, whether you’re new to flash, have tried it and come unstuck, or simply want to brush up on your existing skills, this guide – the first of a four-part series – is for you.
Post author: Chris Gatcum
Free online beginner’s photography course
A Year With My Camera is free by email and will get you off auto mode in less than 6 weeks. Join here and get started today:

Flash jargon
One of the first (and arguably one of the biggest) challenges of using flash is getting to grips with all of the terms and technologies associated with it – it can almost feel as if you are learning a new language! This handy jargon-buster should get you started.
First- and second-curtain flash
When you use flash the camera has two choices: fire it at the start of the exposure when the shutter opens (first-curtain flash), or fire it at the end of the exposure, just before the shutter closes (second-curtain flash). These options are usually selected via the flash settings button on your camera or from the camera’s menu.
A lot of the time it won’t make any difference which one you choose, but one exception is when you’re photographing a moving subject using flash and a relatively slow shutter speed. If you use first-curtain sync in this situation, the flash will fire at the start of the exposure, freezing your subject immediately, and any subsequent movement will appear as a blur. In your image, this means the blur will appear in front of your subject, which can look slightly strange – almost as if the subject is moving in reverse.
However, switch to second-curtain sync and the blur gets recorded first with the frozen flash element appearing at the end. The result? The motion blur appears behind your subject like an atmospheric ‘speed trail’ (adjusting the shutter speed will control how much blur you get).
Flash duration

An ultra-short flash duration can let you photograph moments that just can’t be seen with the naked eye, such as the ‘crown’ created by a drop of water.
It might appear instantaneous, but the burst of light from your flash – the actual ‘flash’ – has a measurable duration. Just like your camera’s fastest shutter speeds it is measured in fractions of a second, although it is typically much, much quicker; the duration of some hotshoe flashes can be as short as 1/30,000 sec.
This means two things:
If you’re using flash as your sole lighting source (in dark conditions, for example) it is the flash duration that is determining your exposure time not your shutter speed. You might have the shutter speed set at 1/200 sec., but if your flash duration is 1/5000 sec. it is that ultra-short burst of light that will be making the exposure; if you set the shutter speed to 1/60 sec. the flash would appear just as bright. The only difference the shutter speed will make to a flash exposure is when it comes to any ambient (constant) lighting, as a slower shutter speed will record more of the ambient light.
Flash is brilliant at freezing fast-moving subjects, which makes studio shots of water-filled balloons bursting, abstract smoke patterns and water droplet ‘crowns’ possible.
Flash duration is closely linked to the power setting you use – the lower the flash power, the shorter the flash duration. This is where you might have to start making compromises. Achieving an ultra-short flash duration of 1/30,000 sec., for example, will require a top-of-the-range flash set at 1/64 power or lower. While this will mean you can freeze pretty much anything, the flash is also going to be quite weak, so your subject will probably need to be fairly close to the camera and you’ll likely need to use a high ISO setting and/or wide aperture as well.
Guide number
In the simplest sense, the guide number (GN) of a flash indicates its maximum power, so a flash with a GN of 34 is more powerful than a flash with a GN of 28, but not as powerful as a unit with a GN of 60. A GN is composed of three elements: a number (which is a distance given in metres and/or feet), an ISO (usually 100) and a focal length (usually 50mm). If you are comparing flashes with a view to buying one it’s important to make sure you’re comparing like for like – some manufacturers give the GN at an ISO of 200, which makes it appear more powerful than it would be at ISO 100.
The guide number also has a practical use, as it can be used to work out the aperture you need to use to get the correct exposure at a given distance, or the distance the flash needs to be from your subject to let you use a particular aperture setting – we'll look at this in more detail in the next instalment of this series.
High-speed sync

High-speed sync (or HSS) is a flash mode that is found primarily on high-end flash models. It is designed to allow flash to be used with shutter speeds that are faster than the camera’s sync speed (see below), which is handy if you want to use fill-in flash and a wide aperture setting on a bright day, or use a fast shutter speed to freeze your subject. To achieve this, a series of flashes are fired in rapid succession, effectively creating a near-continuous light source for a short period of time. However, ‘strobing’ the flash can only be accomplished by reducing its power, so your subject needs to be closer to the camera than it would if you were using ‘normal’ flash.
Hotshoe
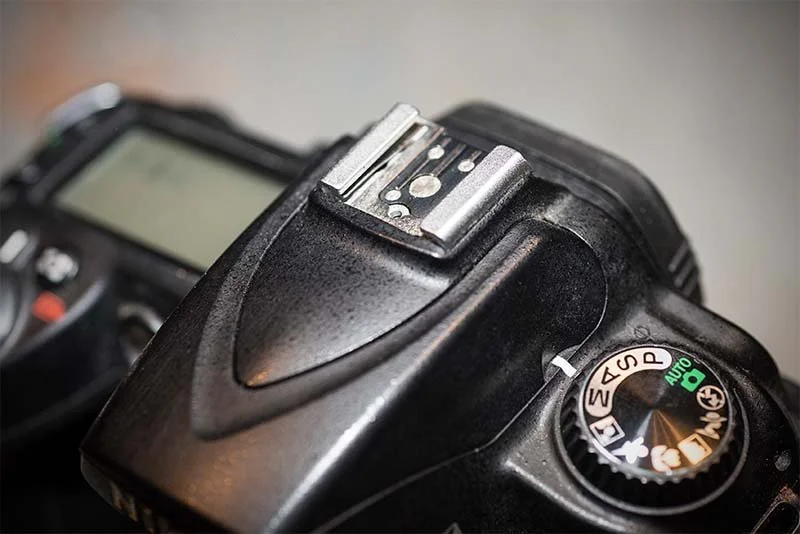
This is the metal connection found on the top of most SLR and mirrorless cameras, which is where you attach an external flash. Two key things to remember are:
Your flash should be switched off before you attach or detach it to avoid short-circuiting anything (although the chance of this happening with modern cameras and flashes is very slim).
Avoid attaching old flash units designed for film cameras to a digital camera’s hotshoe unless you know that its trigger voltage is ‘safe’ for your camera. Some old flashes have a high trigger voltage that can potentially damage your camera’s electronics, so if you are in any doubt, don’t risk it!
PC socket

Developed in the 1950s, a PC (Prontor-Compur) socket is used to connect a flash to a camera via a sync lead. Although most film cameras manufactured in the last 70 years have a PC socket, the built-in flashes and sophisticated flash metering systems found in today’s digital cameras have largely made these simple sockets redundant.
Recycling time
This is the time it takes for a flash to recharge after it’s been fired. A shorter recycling time means you can take more shots in rapid succession, which can be useful if you’re photographing fast-moving subjects or want to ensure you catch the decisive moment in a portrait session. The recycling time of a flash largely comes down to the power setting: the higher you set the power (i.e. the brighter the flash), the longer it takes the flash to recycle, so a flash set to full power will take longer to recycle than a flash set to ¼ power.
Red-eye reduction

While people suffer from red-eye in photographs, cats and dogs can be affected by green-eye; the cause is much the same and your camera’s red-eye reduction setting will help.
When you activate red-eye reduction the flash you are using will fire a small ‘pre-flash’ that is designed to make your subject’s pupils contract. Then, when the main flash fires and the exposure is made, there is less chance of the light bouncing off the blood vessels at the back of their eyes, reducing the chance of ‘red-eye’ appearing in your photographs. It isn’t a perfect solution, though – some red-eye may remain and there’s also a chance that your subject will turn away after the pre-flash thinking the photograph has been taken.
Slow-sync flash

Slow-sync flash combines flash with a slow shutter speed. Perhaps the most common use is when you’re taking a picture at dusk (or night) or indoors when the light levels are low. Using flash alone will light your subject, but the background will almost certainly come out really dark, or possibly even black, as no light reaches it. However, if you combine flash with a slow shutter speed more of the ambient light will be recorded, helping to even out the foreground and background exposure; the longer the exposure, the ‘brighter’ the background will become. If your subject is moving, you might want to consider switching to second-curtain sync (see above) and experimenting with ‘flash and blur’.
Sync speed

If you use a shutter speed that exceeds your camera’s flash sync speed you will only get a partial image, as the sensor isn’t exposed in its entirety.
In the simplest sense, the shutter in your camera is made of two parts that are often referred to as ‘curtains’ (as they used to be made of fabric). When you make an exposure, one curtain opens to start exposing the sensor to light and the other one closes to end the exposure. When you use fast shutter speeds this opening and closing action needs to happen so quickly that the second curtain starts to close before the first curtain is fully open, so the sensor is effectively exposed to a rapidly moving ‘slit’ of light (the faster the shutter speed, the narrower this slit becomes). For general photography this doesn’t need a second thought, but when you use flash it becomes very important. Why? Because at some point the sensor isn’t being exposed in its entirety. If you use flash when this is happening the brief burst of light will only be recorded by part of the sensor, giving you a partial image.
The sync speed is simply the fastest shutter speed at which the sensor is exposed fully, and therefore the fastest shutter speed you can use with flash (unless your flash has a high-speed sync option, as outlined above). Typically, your camera’s sync speed will be in the region of 1/200 sec., but check your camera manual for the precise speed, as it may be a little faster or slower. If you’re using an automatic exposure mode your camera will most likely change the shutter speed to a ‘safe’ setting when you pop-up your flash or slide a flash into the hotshoe, but if you’re using off-camera flash (including studio strobes) or shooting in Manual mode you will need to make sure your shutter speed doesn't exceed the sync speed.
Tilt/swivel

Most mid-range and high-end hotshoe flashes will have a tilt/swivel head that lets you tilt the flash head upwards to bounce the light off the ceiling, or swivel it to one side to bounce the light off a wall. This will not only soften the light, making shadows less intense, but also make the light more directional, as it’s coming from above or from one side. Both of these things are generally more desirable then direct flash.
Zoom head
As well as a tilt/swivel head, some mid-range and high-end hotshoe flashes feature a zoom head that lets you match the spread of light from your flash to the angle of view of your lens. This optimises the light from the flash and ensures none of it is ‘wasted’ illuminating areas outside your shot. Some flashes will set the zoom on the flash automatically to match the focal length you’re using (with the option to override this), while others require you to set it manually.
Being able to change the flash zoom setting manually can be useful. If you’re photographing a group, for example, setting the zoom on the flash to a wider focal length than your lens – the flash to 35mm if the focal length is 50mm, say – will guarantee even flash coverage with no fall off at the edges. Conversely, setting the flash zoom so that it is longer than your lens’ focal length – the flash to 100mm if the focal length is 50mm, for example – can create a deliberate ‘spotlight’ effect, as the flash isn’t set to cover the whole frame. The result is a darkened vignette around the edges of the image; the greater the difference between the flash and lens focal lengths, the more obvious the vignette will be.

What Is A Year With My Camera?
Emma wrote A Year With My Camera to help you be completely confident with your camera controls so you can start enjoying your photography and having fun once again. It’s available free by email (join below) or in an app (search on your app store) or in bestselling printed workbooks available on your local Amazon store.