Post processing and compositional impact
In September a lot of the A Year With My Camera community take (or retake) Emma’s “Composition: Beyond the Basics” online course. This is an intermediate-level course that moves you on from having the odd one or two great images to knowing what you are doing and increasing your hit rate.
There are a number of things you can do at the post-processing stage to give your now well-composed image an extra step-up. Not everybody enjoys post-processing and not everybody thinks it’s necessary. But if you want to explore this final step in image-making you can consider the following techniques.
Helping your viewer around the frame
As you will know if you have taken the course, one of the main techniques for strong composition is knowing how to help your viewer around your frame. Instead of leaving it to chance you can use visual cues to nudge them in the direction you intend.
Understanding contrast is the basic principle here. The eye is drawn to the point of highest contrast (usually the brightest place, but not always) so be deliberate about where you put this point: make it your focal point.
1. Use the clone or dodge tools to reduce or remove distractions.
2. Use a vignette (or less obvious masks) to reduce the contrast in the area around the focal point.
3. Use dodge/burn tools to increase contrast locally.
4. Use a local increased exposure adjustment or the burn tool to reduce distracting “black hole” shadows (assuming you have some detail to recover in the shadows).
5. Use a colour or saturation adjustment to reduce the brightness of a distracting colour or change it completely.
Worked example
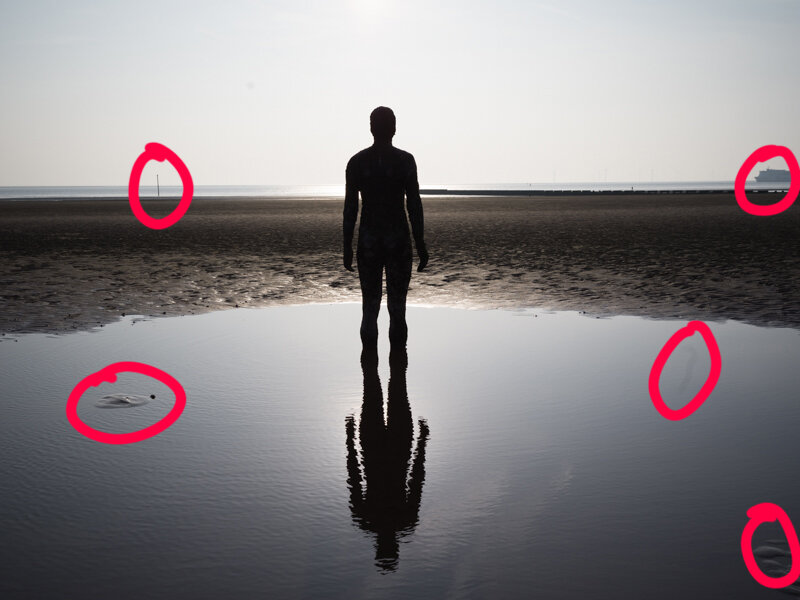
This is an image Emma took of one of Anthony Gormley’s Another Place statues:

Clone tool used to remove the four obvious distractions and the hair on the sensor. Some people prefer only to remove “transient” items rather than removing things that are part of the landscape. Others prefer a completely “eyewitness” approach, removing nothing that was there.
Here, a simple selection was made of each distraction and the “content-aware fill” option used in Photoshop (Edit > Fill > Content Aware). You can also use heal/clone tools available in whatever processing software you use.
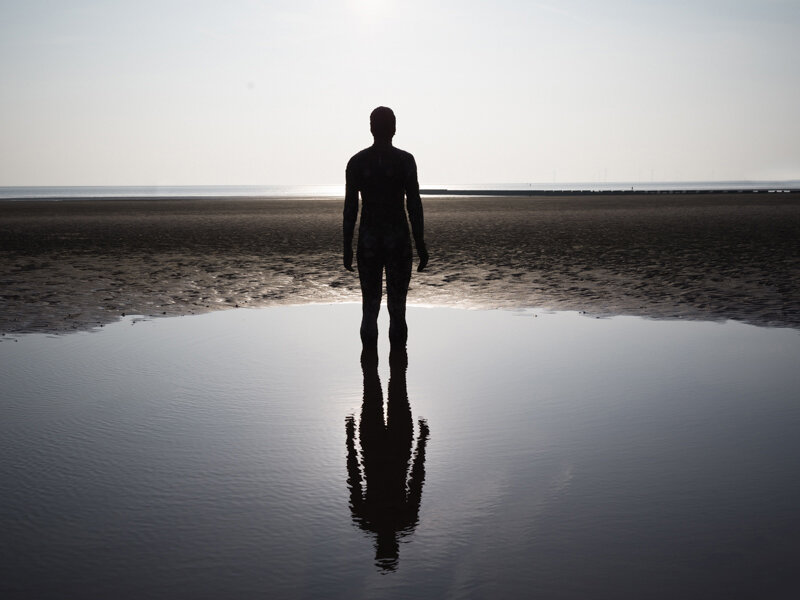
Next, a vignette is added to draw the eye to the centre of the frame. It’s easy to overdo vignettes so back off a bit from what you think is the right amount and always come back after a break to look at the image again:

No other contrast adjustments were needed here but a simple conversion to black and white eliminates all colour information and emphasises the form and texture in the image:


Online beginner’s course
Join Emma’s camera course, A Year With My Camera, here. It’s for complete beginners and will get you to the point your are confident using your camera in public. Join now and get started today: