
7 creative photography techniques
Creative photography is sometimes just a case of trying something new or applying a particular technique to a new situation. Here are seven ideas to get started. If you don’t understand terms like “shutter speed” and “depth of field” join our free beginner’s photography class here:


1. Two light temperatures in one image

Normally photographers aim to have just one light temperature in an image to stop it looking odd but if you do it deliberately it can look fantastic. All light has a temperature which affects the colour it seems to be. In the image above the sky is lit with a cooler blue daylight colour and all the indoor lights are a warmer yellow tungsten.
Try combining any two of these in the same image:
daylight, especially early morning or late evening when it is bluer
indoor tungsten lights (yellow)
indoor fluorescent lights (greenish)
candlelight (yellow/orange)
2. In-camera multiple exposure
Check your camera manual and see if you have the option to do multiple exposures. Most do, you may be surprised. This function allows you to take one shot, move the camera and take another shot. The camera combines both images to give you one final shot. Some cameras let you do more than two shots. This one is nine combined shots:

Your camera may also have the option for you to preview the first shot as you take the second so you can line things up exactly how you want.
3. Panning
If you use a slightly longer shutter speed than normal, say 1/2 second, and track the movement of a moving object while the shutter is open, you can keep the subject sharp and blur the background with a motion-blur effect. This technique is known as panning.

The first time you try it expect lots of trial and error.
Pre-focus using manual focus.
On shutter priority mode dial in about 1/2 second and check your aperture goes small enough to avoid over exposure. If your shots are too bright use a shorter shutter speed.
Faster moving subjects won’t need such a long shutter speed and you might get good results with something like 1/60th.
Start the tracking before you press the shutter and carry on once the shot has finished to make the panned part smoother.
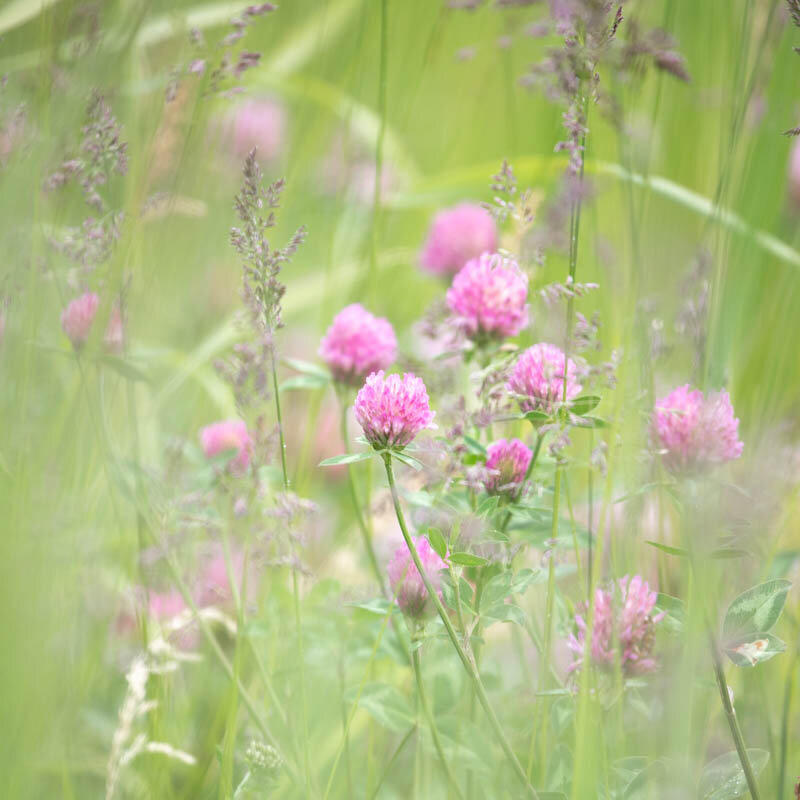
4. Shooting through stuff
You probably know that using a large-sized aperture blurs the background of an image but have you considered that it also blurs the foreground? These images were shot using an aperture of f1.2 and all the out-of-focus stuff in the foreground is grass and other wildflowers.
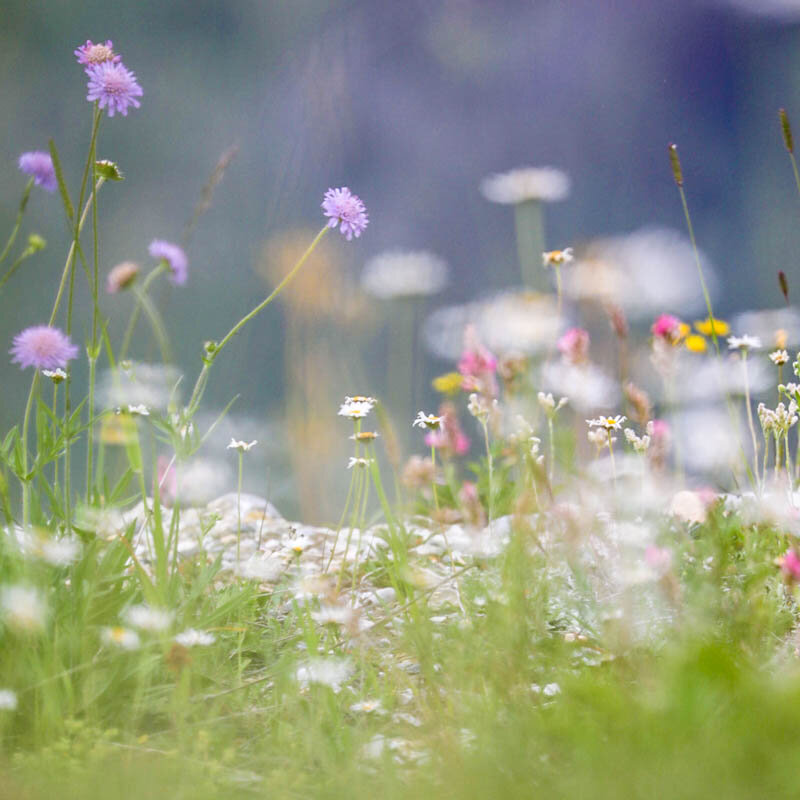
Focus very carefully.
Use your largest-sized aperture (f2.8, f4).
Try holding semi-transparent things around the edge of the lens to get interesting vignettes - plastic bags, tissue, torn tracing paper.
5. Intentional camera movement
This is a similar technique to panning but in this case you don’t need a particular subject to stay sharply in focus. The movement is exactly the same: start panning, gently press the shutter, keep panning once the shutter is closed again.

1/6 second, f22, ISO100, 40mm, 5DIV
A shutter speed of about 1/2 second usually works well.
Prefocus using manual focus but try focussing on different parts of the scene to see what happens to the out-of-focus parts.
Scenes with high contrast work best.
You don’t need to pan in a horizontal movement. You can get some interesting photos by twisting the camera while the shutter is open:

1/8 sec, f22, ISO 100, 40mm, 5DIV
6. Long exposure
What happens if, instead of you moving the camera, you keep the camera perfectly still and let the subject pass you by? You get create other-worldy shots using this technique on subjects like moving water. To emphasise the effect try and have at least one thing in shot that stays still like the foreground rocks in this shot:

51 seconds, f16, ISO 100, 45mm, CFV II 50C/907X, 6-stop ND
You must use a tripod or another method of keeping the camera perfectly still while the shutter is open (eg. rest it on a wall and use the self-timer).
Long exposures during daylight tend to over expose quickly so either wait until it is getting darker or use neutral density filters (which are like putting sunglasses on your camera).
Use manual focus to make sure your “stationary element” is sharp.
Another good subject is traffic light-trails if you can find a safe place to set up on a bridge or by the side of a road.
7. Long exposure for large depth of field
If you are frustrated that you can’t get front-to-back depth of field in your still life photography, are you using a tripod? With a tripod (or a pile of books) you can allow your shutter speed to stay open as long as you like in even very low lights and still get a well-exposed shot that is sharp as you like.

f16, 3.2 seconds, ISO100, 50mm, 5DIV
Pre-focus about a third of the way into your subject using manual focus. Or if you understand hyperfocal distance, calculate the optimum focus point for your required depth of field.
Using aperture-priority mode and your chosen aperture, let the camera decide how long a shutter speed you need. As long as your subject doesn’t move and you don’t march around the room causing vibrations, you can have an exceptionally long shutter speed with no ill effects.
Turn off image stabilisation/vibration reduction if your lens has the option.

Professional photographer Emma Davies has both undergraduate and master’s degrees in Psychology, specialising in learning creativity. She has written a do-at-home creativity course just for photographers which is available to buy on your local Amazon store. Read this post for more information and to see inside.