
Indoor flower photography
How to set up a table-top flower studio
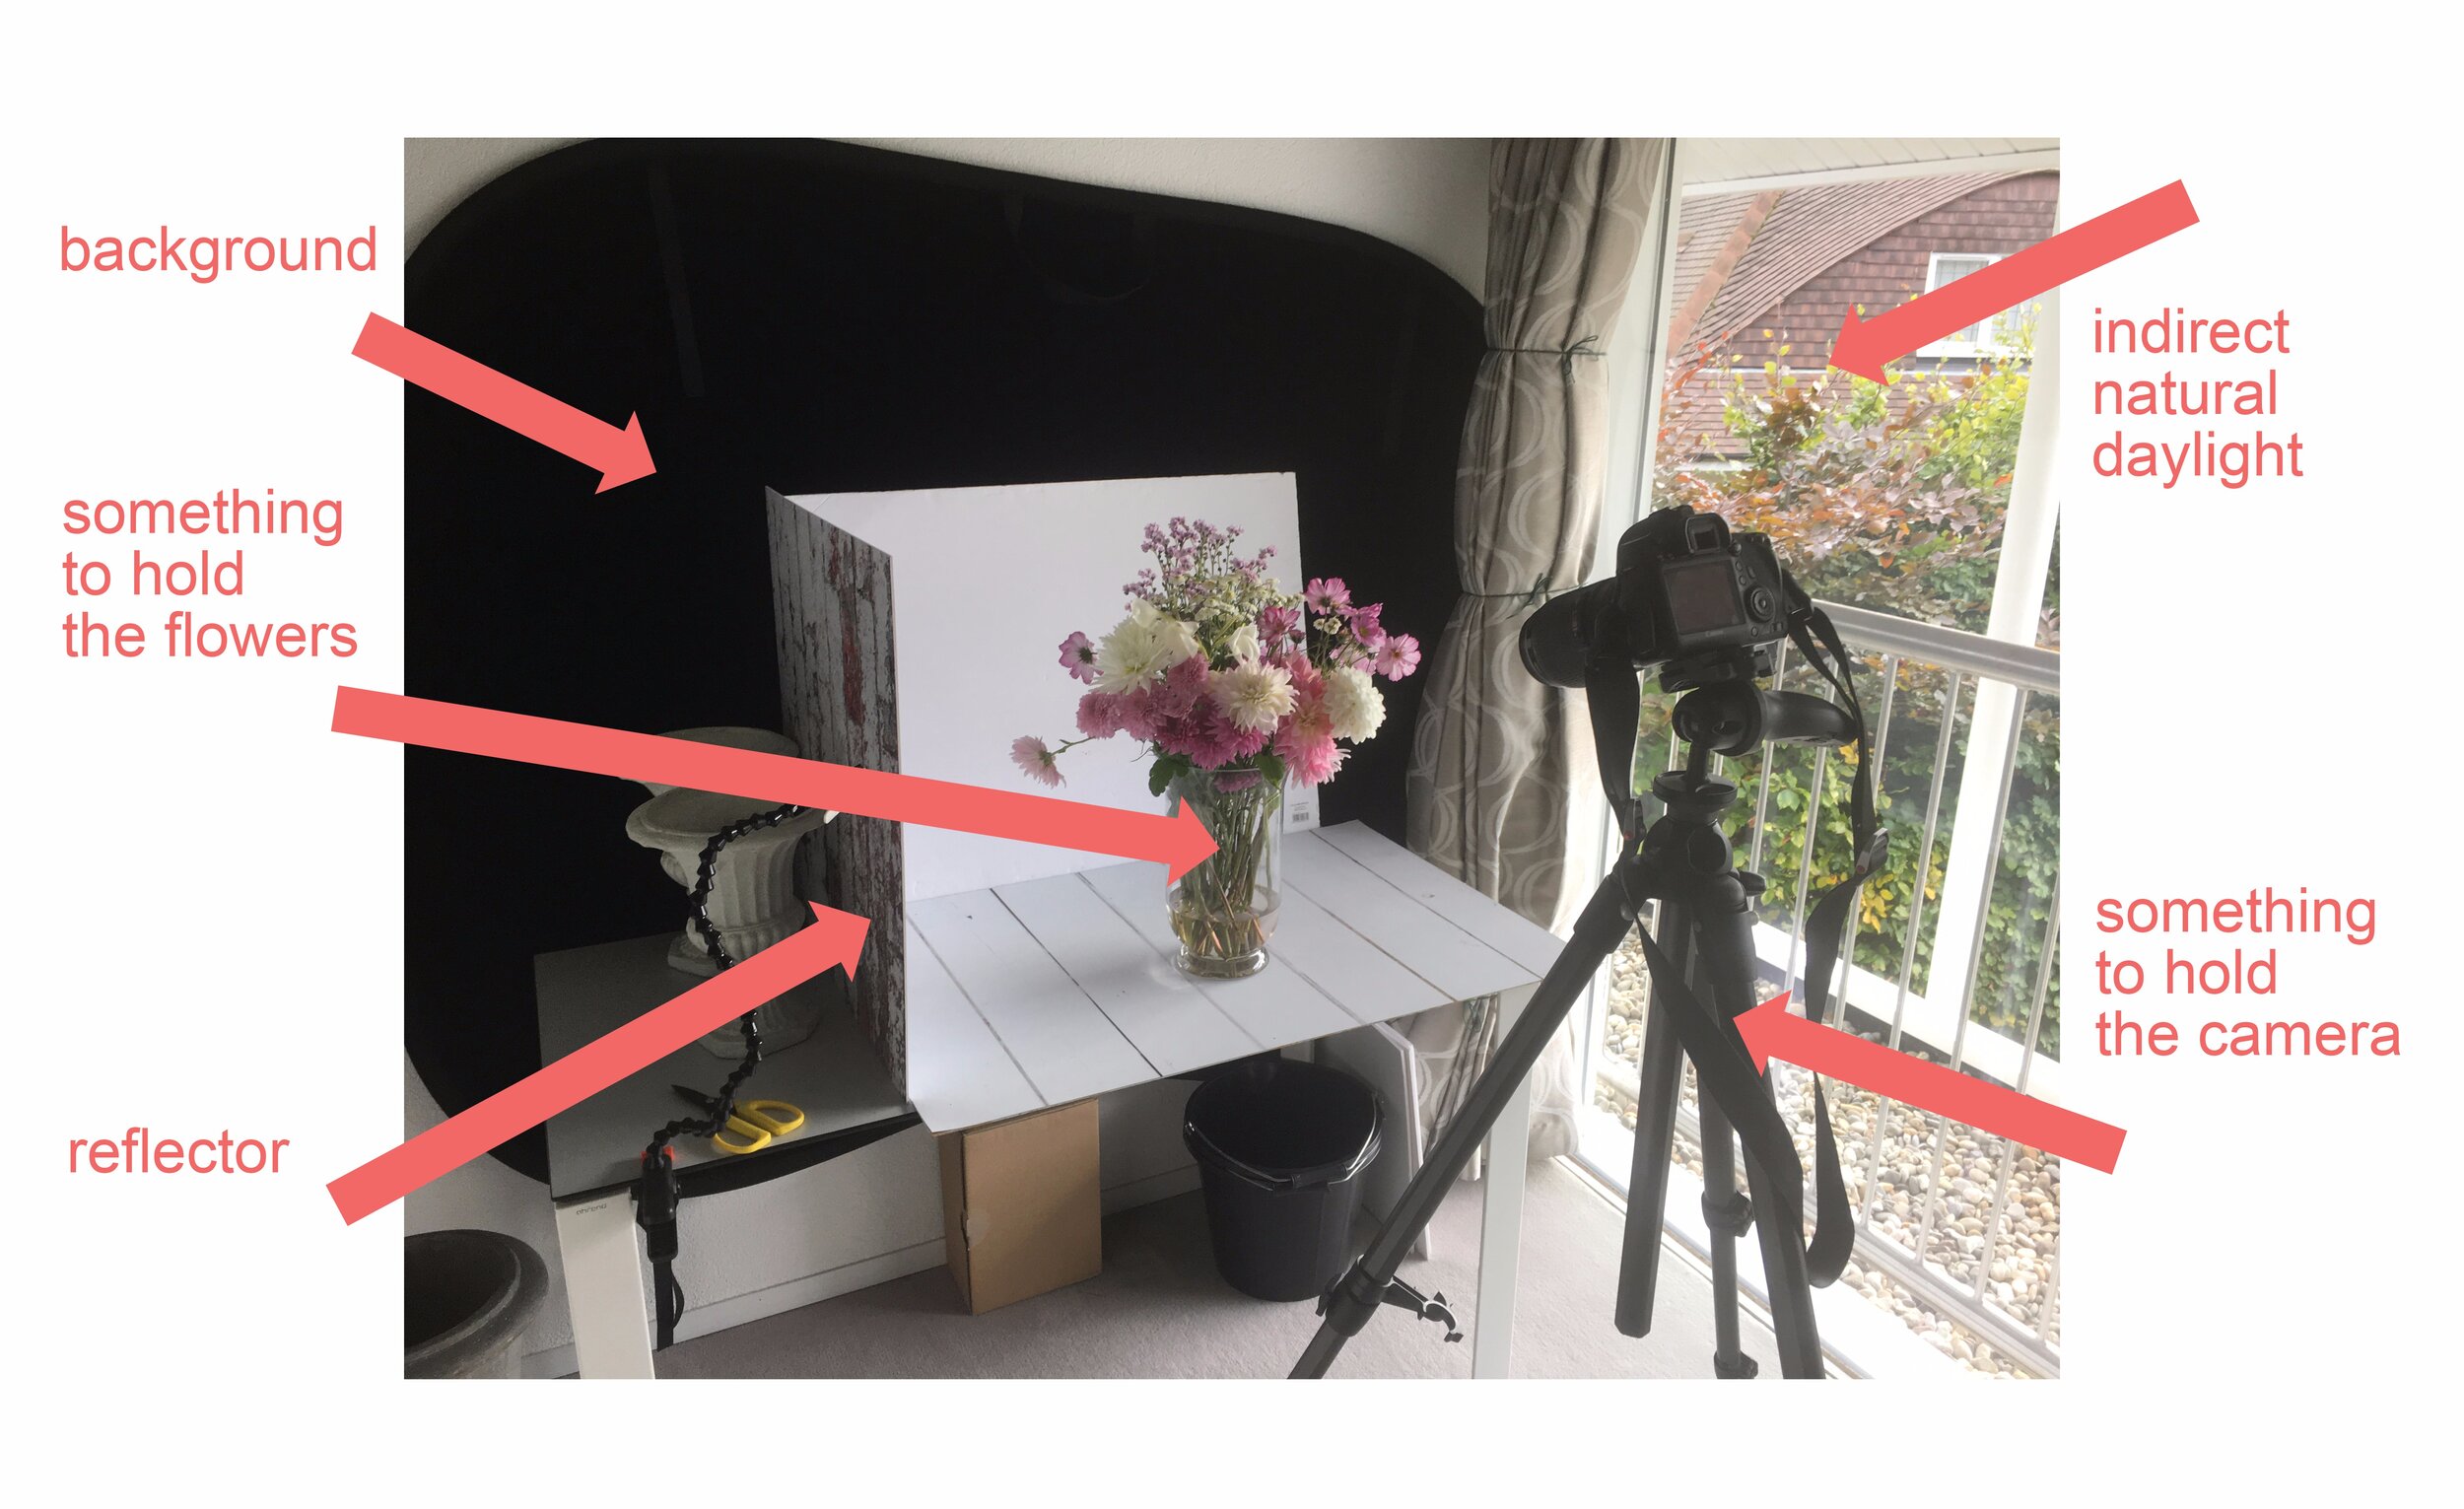
You will need:
1. A source of indirect natural daylight
2. Background
3. Reflector
4. Something to hold the camera
5. Something to hold the flowers
Online course: The Art of Flower Photography
This blog post is adapted from the pre-course reading in Emma’s once-a-year online course The Art of Flower Photography. The course itself covers everything you will need to source, arrange and photograph flowers indoors and out.
In 2021 the course starts on 7 June and you can join by clicking this link.

1. Indirect natural daylight
Because flowers don't move, you do not need to invest in an expensive studio light or multi-head flash set up. Studio lights make it possible to use short shutter speeds with moving objects (people, mostly). They also allow for precise, replicable lighting which is essential if you are shooting products for a catalogue. But flowers don't move, and we are shooting for our own pleasure, so we can use whatever available light there is, and allow the shutter speed to climb to whatever is needed to get the exposure right. Be prepared for shutter speeds of up to 30 seconds in this course.

You can see from the image above that you don't need a big space. The critical element as far as the lighting is concerned is that it is indirect. You don't usually want your subject to be in direct sunlight.
Look at the difference in the shadows and the colour in each of these shots. The first is shot in indirect sunlight, the second in direct sunlight:

Unless you are deliberately including hard shadows in your composition, avoid using direct sunlight. If you are having trouble finding a spot out of direct sunlight, you can always use a piece of tracing paper or other translucent material to diffuse the sunlight:

2. Background
Your background needs to support the subject whilst not distracting from it. Sometimes you want a bit of context, other times you want a blank slate.
For a plain white background
Emma uses 5mm white foamcore (available from craft and DIY shops). It is very light and very cheap and you can use small clamps to hold it up, or just lean it against the wall:

Read this post for more behind-the-scenes on using textured backgrounds.
For a plain black background
A black background is tricky to get right. As with white backgrounds, it will tend to show up slightly grey unless you manage your exposure correctly. It will also show every speck of dust and reflection. If you want to do a lot of low-key, darker background photography Emma recommends investing in a collapsible black fabric background. She uses a vintage collapsible one made by Lastolite that isn't available any more, but they do have a more up to date option (search for "black velvet Lastolite collapsible background"). If you fancy some DIY, you can create your own using black velvet or black chenille - any kind of fabric that has absolutely no reflections.
Black foamcore boards (available from hobby, craft and DIY shops) can work well as a black background, but they are usually only available up to size A1, and you can have problems with reflections as they are not completely matte. But they are a cheapish way to get started with a darker background.
Another key thing to remember with black backgrounds is to try and keep them darker than your subject. This is easier to manage than the white background equivalent (where you need to keep it lighter than your subject) - you just need to keep the background in the shade whilst the subject is in the light. Emma controls this by using curtains to cast a shadow onto the already black background, making sure it is as dark as possible:

3. Reflector
The simplest thing to use is another piece of white foamcore (sometimes called foam board). You can also use white paper, a white towel, aluminium foil, a white wall - anything that will bounce your main light source back into the shadows on the opposite side of your subject to soften the contrast. Note the fake brick backdrop in this example - it's a piece of wallpaper:

4. Something to hold the camera
You do not need an actual tripod but a sturdy tripod does give you the most flexibility. It makes it easy to position your camera, and if you have a central column, you can manage top-down shots easily. If you do shoot in this position, make sure your tripod won't over-balance. If necessary, add a counterbalance to the other end of the central column (a camera bag is usually about the right weight).

You can make a start using just a pile of books or a bag of pasta instead of a tripod - anything that means you are shooting hands-free:

5. Something to hold the flowers
As long as it stays out of sight and holds your flowers rock-solid, you can use anything to get the flowers where you want them. For single stems Emma uses a Plamp (it's short for "plant clamp"):

You can also use chicken wire and simple vases to support your flowers. Many flower arrangers use florist's foam ("Oasis") but Emma avoids it completely because it is not biodegradable (it's made of plastic), and has a number of potentially toxic chemicals in it including formaldehyde and carbon black.

Back to basics
If you need a foundation course that covers the complete basics of photography including shutter speed, aperture, ISO and composition, join Emma’s online course for complete beginners, A Year With My Camera. The email version is free and you can join here:

